Saturday, March 9, 2013

Friday, February 22, 2013
Monday, April 2, 2012
You've come a long way baby...
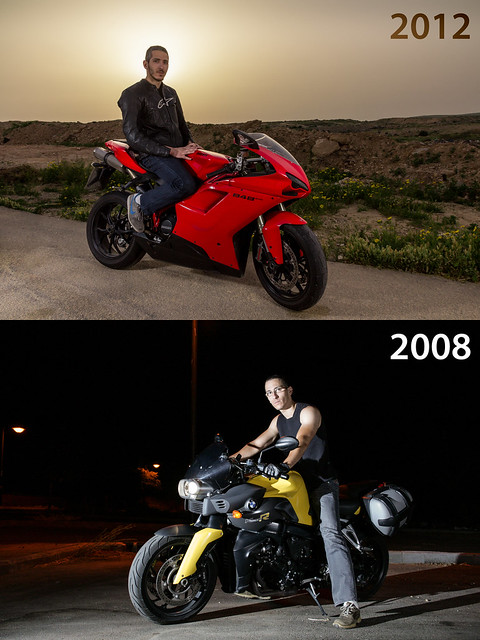
It's been over 5 years since I was first inspired by David Hobby's blog - Strobist.com. Four years ago I took the plunge, got myself a Poverty Wizard, a Shoot-Though umbrella and began experimenting with controlled light.
Not long after, I called my friend Roi out for a photo-shoot on his BMW motorcycle, as you can probably see, my skills at the time were rudimentary.
Four years passed since that day, four years of light and learning. Roi traded in his heavy duty BMW K1200R for a sleeker Ducati 848, and I somehow became the proud owner of three strobes and two light-stands.
 |
| I can't recall the power setting for the sun... |
At the distance the fill light stand was positioned, you could hardly call the light "Harsh", though there was some light spillage on the asphalt which was cleaned up in post.
I had the setting sun working hard in this shot: First as shadow control, secondly as separation and lastly - for a nice "halo" effect.
You might notice that the light-stands have rocks holding them in place. Weighing down your equipment is important when there is even the POSSIBILITY of a slight gust of wind as I painfully realized when a sudden squall knocked over my key light, destroying an umbrella and nearly taking my SB-24 with it as well.
 |
| R.I.P. Trusty Shoot-Through. |
So there you have it, four years and I still feel like I've only scratched the surface. I'd like to take the opportunity to thank David Hobby for introducing me to the wonderful world of off camera flash, his Lighting 101 and Lighting 102 series are better that most photography courses (not to mention cheaper!).
Friday, March 4, 2011
Adding a PC sync cable to your poverty wizard.
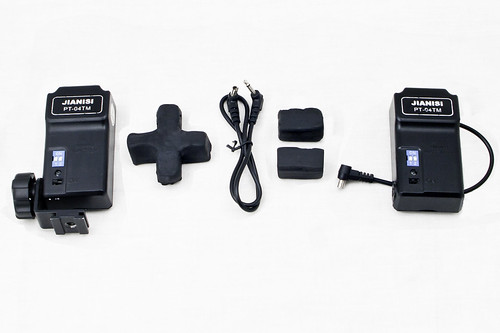
Since I originally only had a EX-430II flash, my first remote trigger was a Dealextreme bought PT-04. Since the EX-430II doesn't support external sync (shame on you canon!), the lack of a PC-sync out on the trigger was no big deal.
As my strobe collection expanded, and Light stands appeared in my inventory - I wanted in on the pc-jack goodness. Since I decided to stick with the PT-04's for compatibillity - my go-to solution was a soldering iron and a pair of wire cutters - shortly afterwards, my PT-04's had a pc sync-out.
If you haven't yet bought a remote yet, you might as well save yourself the trouble and get one that supports PC-Sync out of the box like these: AT-16, YN-04, and the nameless RF-Remote. Rumors are that even the latest PT-04's come with a PC-link. If you've already got a hotshoe-only remote, or are for solder happy and hell bent on going DIY - read on!
First of all, I must emphasis that doing this wrong (or even doing it right as far as I know) just might fry your precious 400$ strobe - so consider yourselves forewarned! I will not be held responsible for any fried strobes, or fried pets/people for that matter. Most strobes contain high-voltage capacitors, as far as I know this high voltage should never end up in the strobes outward-facing terminals - but again, I'm no expert - so be careful!
With that behind us - lets get to the fun stuff!
You'll need a PC-Cable (I'd recommend having at least a few spares), soldering iron, wire cutter/stripper, a small drill (even a manual one will do) and a multi-meter to test the connections.

Next, cut of the 3.5mm end of the PC-Cable (the end you would normally plug into your camera) and strip that end of the wire. Strip the two internal cables as well.
 |
| click to enlarge |
I've found that while securing the cable in place, this knot sometimes breaks the wire within the PC-Cable - rendering it useless, so you might want to opt for some other method. Hot glue, for example, comes to mind.
Using the multi-tester, check which line leads to the PC-Cable's internal pin, and which leads to the external "circle". Now comes the tricky part - solder the wire that connects to the internal pin to the terminal corresponding to the hotshoe's inner "dot", then solder the second wire to the remaining terminal. Be sure not to leave any loose wires hanging around inside the remote - they could easily cause short-circuits (remember what I said about frying expensive strobes/beloved family members?).

To the left you can see the remote with a PC-Cable already knotted and soldered correctly. Before you close up - check conductivity between the PC-Cables terminals and the PCB, or even the remotes hotshoe. If everything checks out - close up, and your done!

Thursday, February 17, 2011
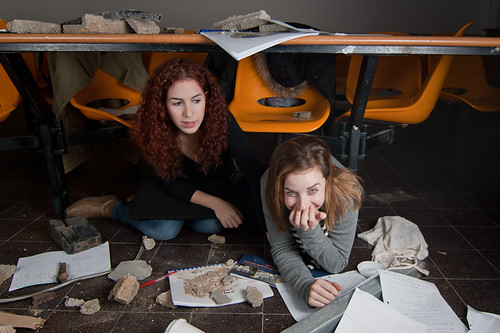
Earthquake!!
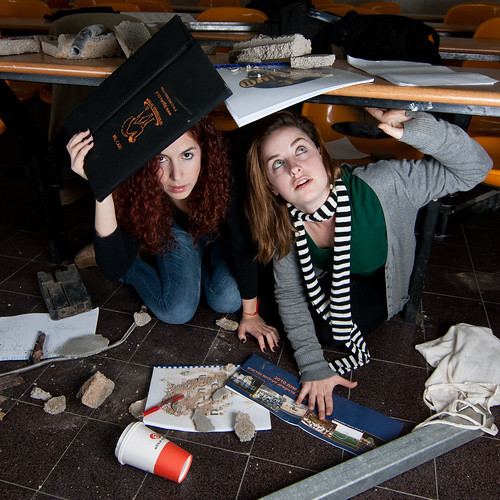
Expecting an "earth shattering" event, my university decided upon an earthquake theme for advertising this years largest student event - an all night party and live music show called "Student day".
I wasn't really digging the whole "earthquake" theme, and to make matters worse, I was sent this video and asked to "shoot something like this". Resisting the urge to remind them that I was a still photographer, I started thinking of good still images that would properly convey the feeling of an earthquake.
After rounding up a few cooperative students and visiting a local construction-site dumpster, I was in business.
We set up the shoot in a free classroom. Shooting on campus was easy, since all the furniture I needed wa already there, and it came with the added bonus of making the shots feel familiar to the students who would eventually view them. Carmen and Amaliya, my two models were just perfect for the job - they weren't afraid to get a bit dirty, and gave great expressions all through the shoot.
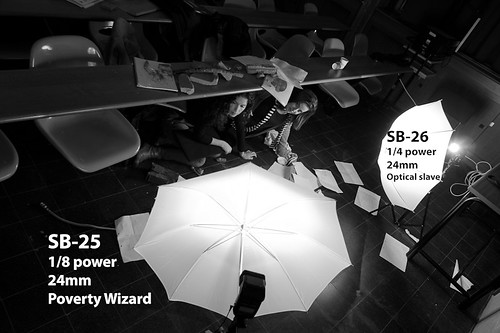
Lighting was sweet and simple, cross-lighting shot through two white umbrellas, with the key (camera right) at 1/4 power and the fill (camera left) at 1/8 power. This setup also got enough light bouncing around the small room, that I didn't really need the extra strobe I brought to act as a background fill.
For the second scene, we needed an extra model, so we grabbed a student out of a nearby class. With Carmel already in position, I told our impromptu model "just kneel beside her, grab her shoulder, and act like your not sure what to do" - "ok, but how do I do that?" - SNAP! - perfect shot.
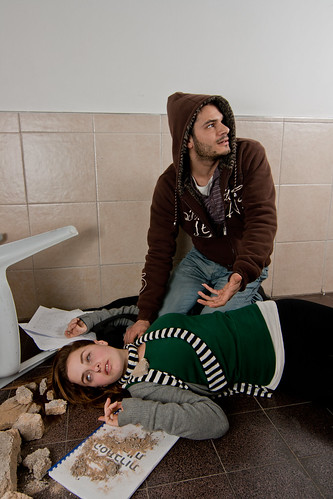
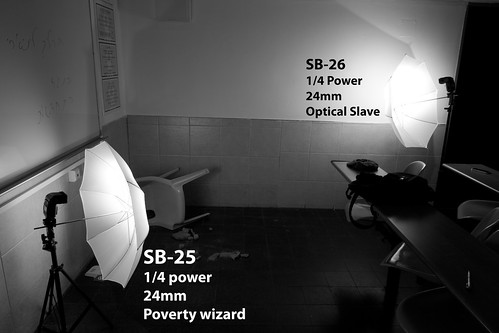
Again, lighting was simple - key at 1/4 power, camera left, and a fill high-up camera right also at 1/4 power.
The whole shoot went so smooth, that before I knew it, I had perfect shots of each scene. Start to finish, the whole thing took less than an hour - most of which was spent either throwing around broken blocks or cleaning up the mess we've made.
I really have to hand it to all the wonderful people that made this shoot possible - Amalya and Carmen, our anonymous male model who was gone before I got his name, and of course - my beloved Valerie, who gave invaluable styling advice and kept the models both focused and happy.
Saturday, February 5, 2011
Cookies 'n' Creme Fudge
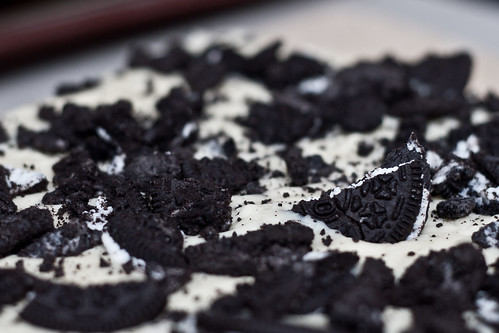
Sinfully delicious fudge, made from this recepie.
Shot with one off-camera strobe bounced off a nearby wall for some nice, all-around light.
Released under a CC-BY license, please credit "Boaz Arad" and link back to either www.boazarad.com or www.luxphile.com
I'd love to hear about it if you use it!

This work is licensed under a Creative Commons Attribution 3.0 Unported License.
Complementary Creative Commons Casio Calculator
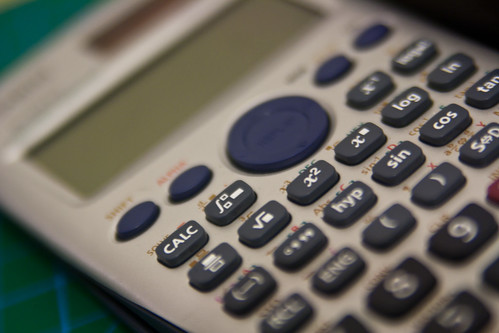
Macro shot of a calculator, released under a CC-license for all your math / study illustration needs. Pictured is a Casio fx-991ES calculator that has gotten me through meny tough tests.
Be sure to provide credit to "Boaz Arad" and a link back to www.boazarad.com or www.luxphile.com
If used, I'd love to hear about it!
This work is licensed under a Creative Commons Attribution 3.0 Unported License.
Friday, February 4, 2011
The Forest Rangers Tower
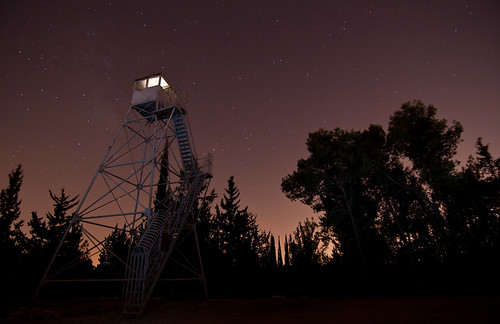
A 4x4 enthusiast friend of mine called me one evening "You've got to see this I'm coming to pick you up, grab your camera gear" he said, and before I knew it we were riding into the night in his jeep.
After about twenty minutes on a winding dirt road through the forest, we arrived at a clearing, and I immediately saw what he was so excited about: A decommissioned fire lookout tower stood alone against an amazing starry backdrop.
The moment I saw the tower, I knew I wanted a light inside the observation deck. This was easier said than done though, since the stairs were caged and locked. Not to be deterred, me and my faithful companions began to exercise our nearly forgotten monkey-bar skills. Using a sing that read something on the lines of "Do not climb, you will die" as a foothold, we managed to get past the cage and up the stairs.
Met by a locked door at the top, I climbed past the railing, over a four story drop, and into a window. Inside I found that the tower had become a popular pigeon roost, insomuch that I had trouble finding a spot where I could set down a strobe and still want to pick it up once the shoot was over.
After making VERY sure that my poverty wizard was working properly, we climed down and got ready for the shoot.
Setting the camera on a tripod, I dialed in a 30 second exposure, this gave the sky a good exposure, and gave me enough time for my flash shenanigans. After releasing the shutter, I first manually triggered the remote flash, then used a handheld strobe to paint the towers base with three low-powered shots. While I was doing this, I had a friend run around with a third strobe, and paint some light onto the surrounding trees.
It took about 15 tries to get a well lit shot without any residual silhouettes, or over/under exposed sections of the scene.
Lastly - in the spirit of "don't try this at home" - I really recommend you avoid risking you wel0lbeing in order to get a good shot. In retrospect, climbing that tower wasn't the brightest of ideas. Since I have yet to see a shot worth dying for I truly suggest abiding by signs that read "Don't... or you'll die" - and hey, even if the shot IS worth dying for, it's no fun missing out on all the ensuing fame and fortune :)
Thursday, February 3, 2011
Tighten Up
Rhodes 2010
Shot with natural light. Modeled edited, and titled by my beautifully beloved Bilirubin.
Wednesday, February 2, 2011
OMG Finals!
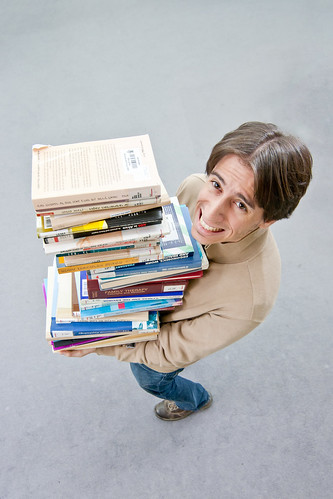
The semester is over, finals are coming up. The editor of our Local student calls me up and says:
"we needed a cover shot, something 'test related' Oh, and did I mention it's due in five hours? we need to make our printing deadline..."
After a short brainstorming session, I wasn't quite sure what I was going to do, but I knew it was going to involve books... I posted a quick shout-out for modeling volunteers on my Facebook page and headed towards the library.
The head librarian was kind enough to give me free reign to wreak havoc in the humanities library (nobody actually studies there anyhow, I mean, seriously - humanities?).
My Facebook post landed me a student that was hoping front-page exposure would impress the ladies. With everything in place, I was ready to shoot.
My first concept, which turned out to be the money shot, was a student being "crushed" by the weight of his study material. One thing I didn't consider - is that a stack of books half the hight of an average person - is VERY heavy. Using random books we could only stack to chest height, which was not nearly hight enough. So we set out to find the lightest books in the library.
After gathering a pile of think books printed on cheap paper, I set up two speedlights on both sided of my subject, and shot them straight at the ceiling for simple all-around light. On the bright side, the unexpected weight of the books really helped me get an expression of genuine suffering out of my model :)
The final shot was taken from above, using a wide angle lens. This was made possible by a conviniantly placed staircase. A nice and even background was provided by the libraries grey wall-to-wall carpeting.
The whole shebang: planning, coordination, shooting and post processing was over in less than four hours and, once submitted to my editor, received what I consider the highest possible praise any editorial photographer could ask for: "This is exactly what I had in mind".
If you like, you can see the final publication (Hebrew) here.
Tuesday, February 1, 2011
Yermi Kaplan
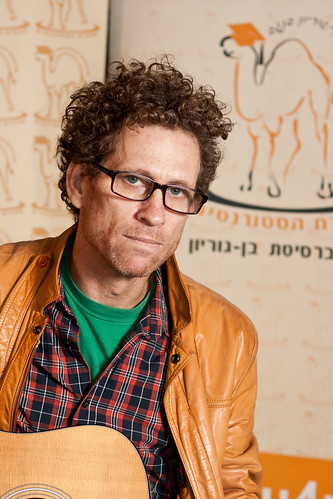
Ben-Gurion University has a tradition of hosting quality live performances every Tuesday. These performances are usually free for students. As head of the student body's photography department, I was tasked with providing on-the-minute "teaser" images for these events.
Since each artist only arrives on campus less than an hour before his performance, and is usually busy setting up for the show - I'm lucky to get even five minutes of their time.
To overcome these constraints, I had to work fast, and keep the shoots simple.
I opted for a single strobe (SB-26 camera right), shot through a white umbrella at 45 degress to the subject. This allowed the light to act as both a key light for the subject, and as a fill light for the background.
I set the shutter at my maximum sync speed, and shot at half/full power. This allowed me to close up the aperture enough in order to filter out all the hideous and mixed temperature stage lights.
The background was provided by two student body logo posters I pulled together from the sides of the stage. And before the artist arrived, I used one of the stage crew as a stand in to test the lighting setup.
When Yermi came in to do his sound check, I shot a few frames and was done in less than three minutes. This was rather fortunate, since less than 30 seconds later me and my light-stand were quickly shooed off stage.
Though Yermi came out a bit tight-lipped in the final shot, I rather like it, and think it rather reflects his musical style. If you'd like to hear some of his music you can visit his myspace page. And if you're ever near Ben-Gurion University during the semester, be sure to drop by for a free cultural treat!
Monday, January 31, 2011
Creative Commons Cat
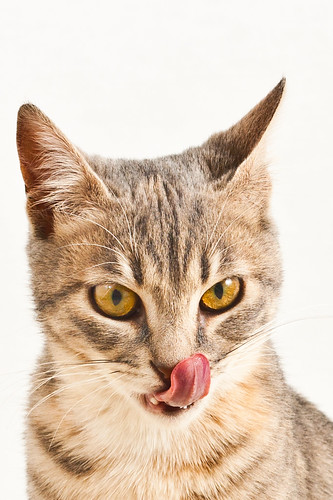
Creative-Commons licensed for all your cute-kitty needs :)
She really is an angel, and your likely to see more of her in the future.
If you use it, I'd love to hear about it!
Please provide attribution by name (Boaz Arad), and a link back here wherever possible.
Lighting info:
Key: SB-26 at 1/4 power, fired through a white umbrella - camera right.
Fill: Bare SB-25 at 1/4 power, aimed at the background and partially bounced off a wall - camera left.
This work is licensed under a Creative Commons Attribution 3.0 Unported License.
Saturday, January 29, 2011
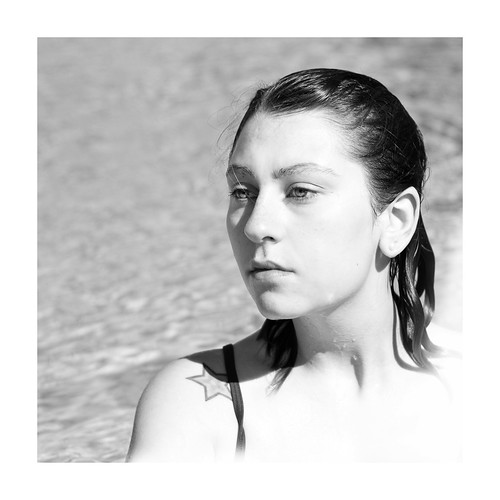
Water Wonderland
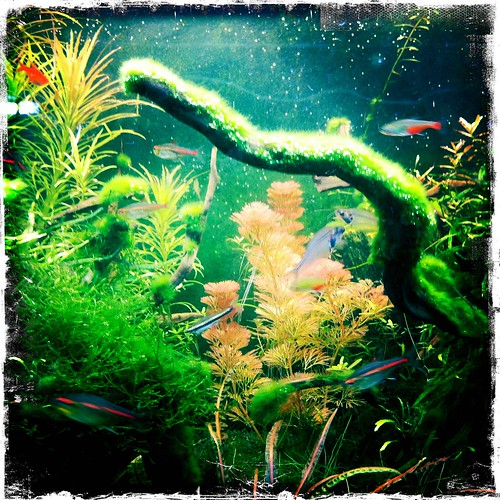
One of the great features of the iPhone's camera, is that you can easily lay it flush with any glass surface. While doing so, most standard bumpers will protect your lens from scratches while still giving you a good light-seal.
To get this same shot with my SLR, I'd have to rig up a complicated array of black cloth to avoid reflections, and even the, I'd still have to deal with dirty glass. With my iPhone - all I needed to do was find a tiny piece of clean glass. I hope you like the result.
Wednesday, January 26, 2011
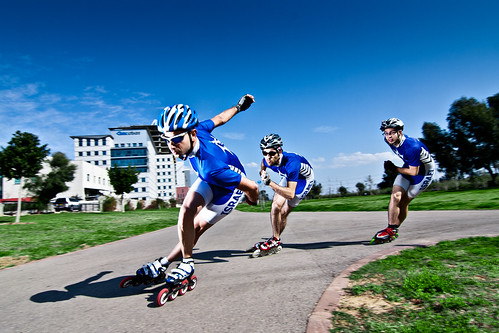
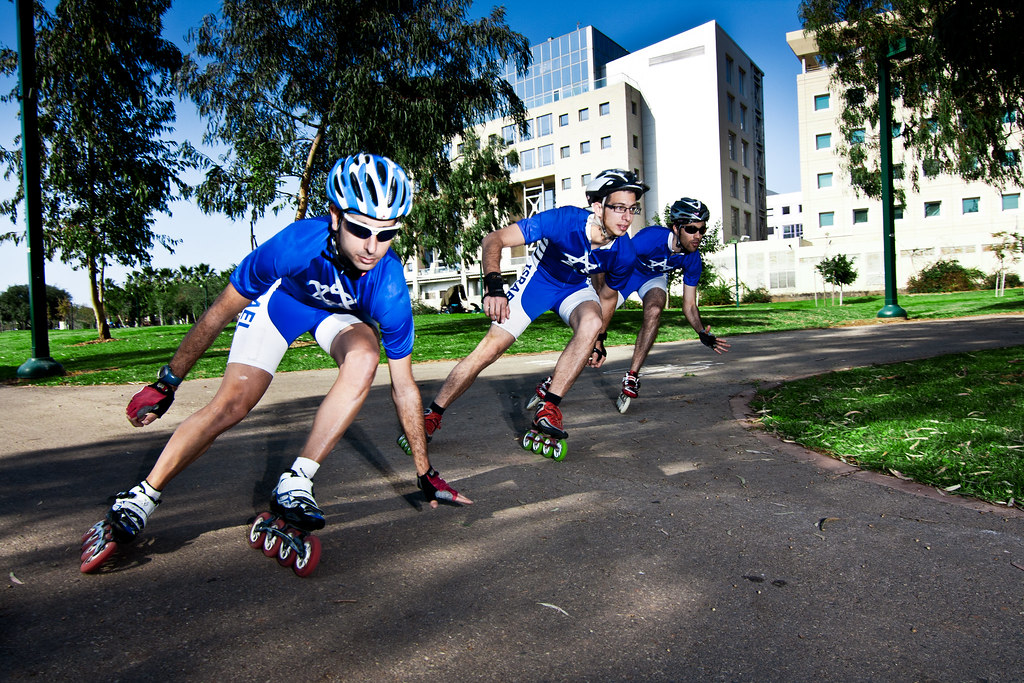
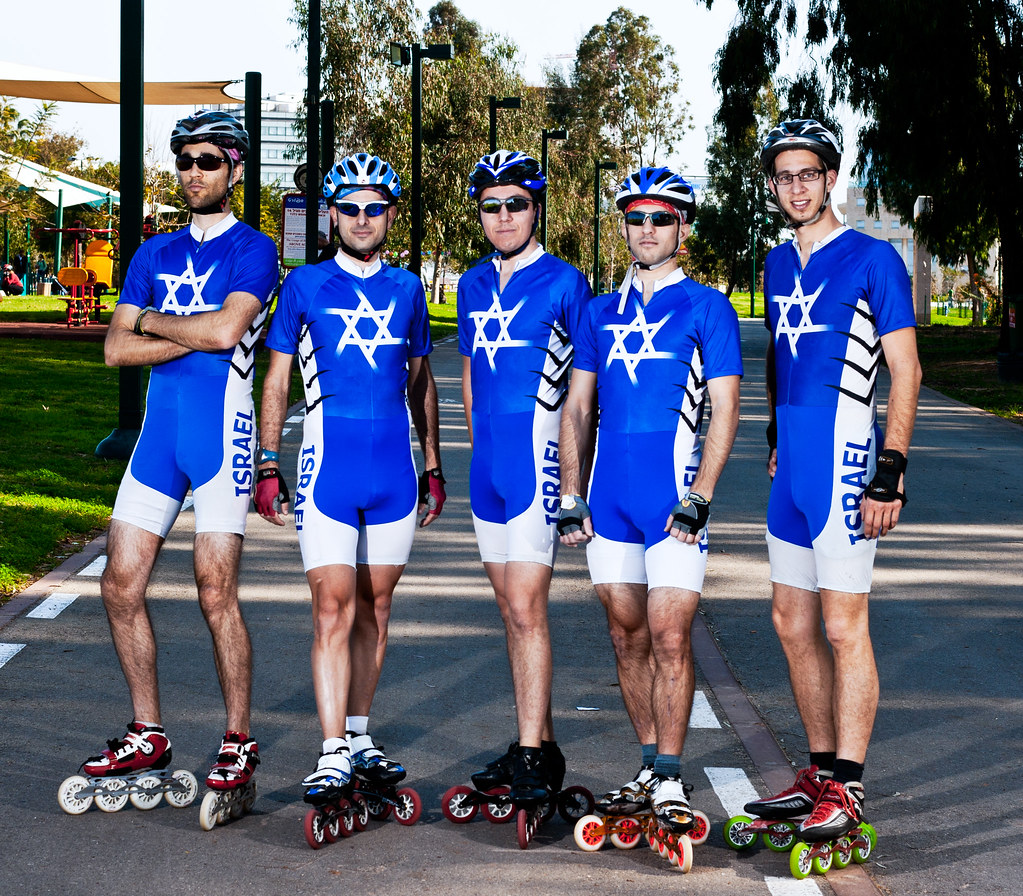
Israel's Speedskating team
Speedskating is a small but growing sport in Israel. This April, the country will be holding it's first ever speedskating half marathon, as part of the Tel-Aviv marathon events. Since the event is an Israeli first, the organizers had trouble finding appropriate images to advertise it. As a member of the Israeli speedskating team, I was glad to help.
First off, I set up a simple cross-lighting setup for a few "safe" shots, and the obligatory group shot. Two naked speedlights (SB-25, SB-26) on both sides of the skating path aimed straight at the group. The flashes were set to full power (in order to overpower the sun) and triggered by a pair of poverty wizards. For this shot, I asked the our video guy to click the shutter release, so we could get the whole team in the shot (myself included).

Next up, without changing the lighting, I asked the team members to skate down the path, and shot them as they passed through the speedlights.
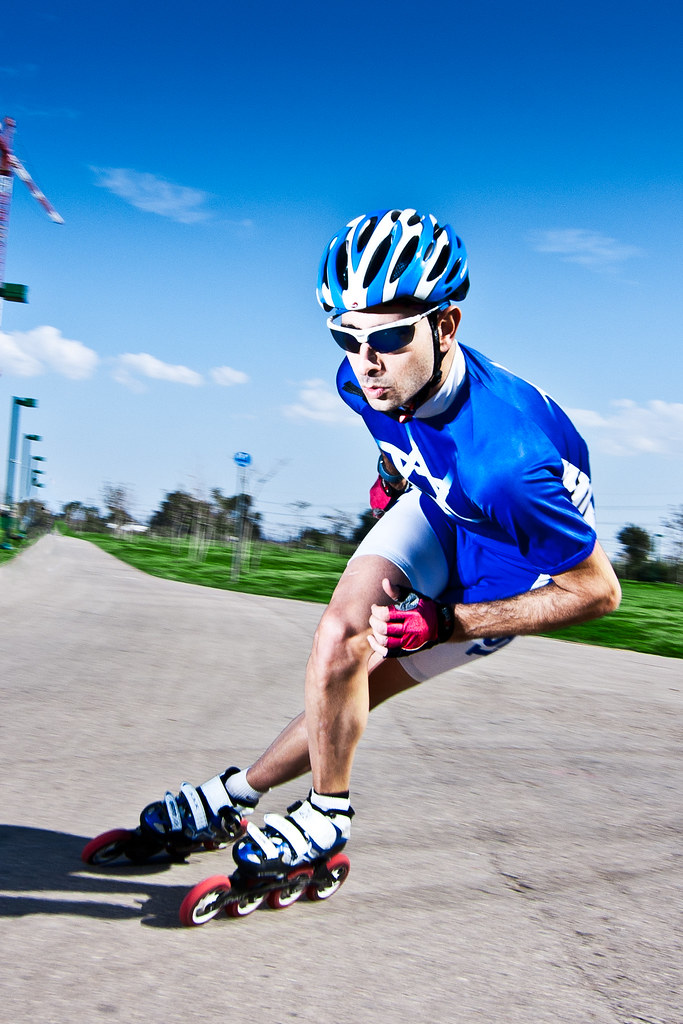
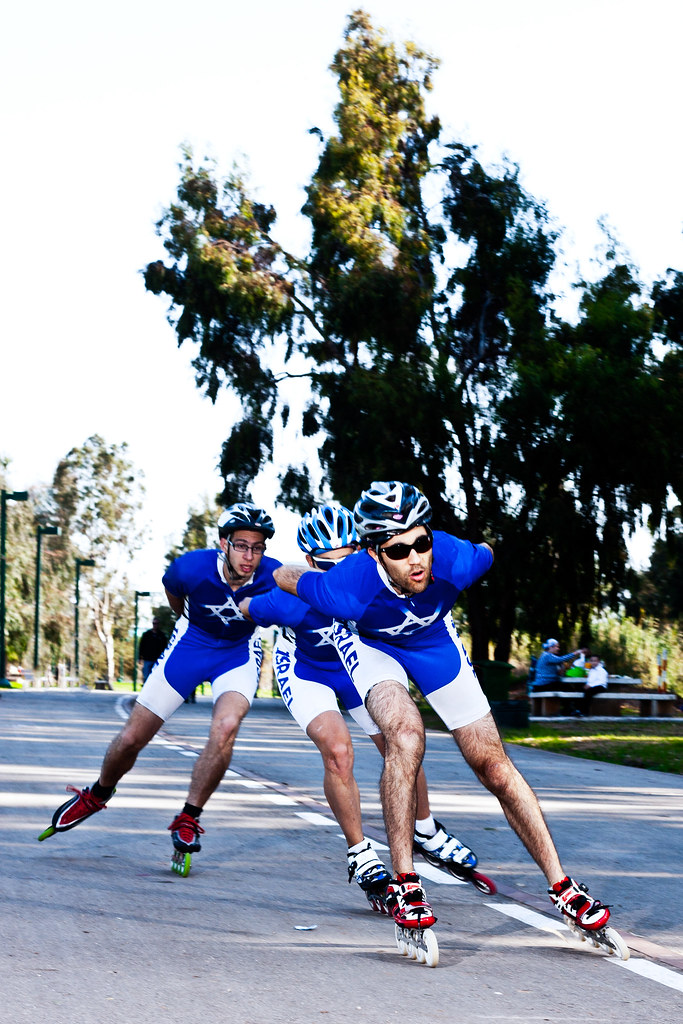 Once I had a few "safe" shots on my hands, it was time for something a little more exciting. Speedskaters always look their best while taking turns. I set up two speedlights at knee hight, directly in front of the corner, facing the sun. Setting them on full power, and a narrow beam, I got just enough light to match the strong back-light of the noon sun.

After having some fun on one corner of the track, I moved the lighting setup to a shadier corner, in hopes of increasing the contrast between the skaters and the background
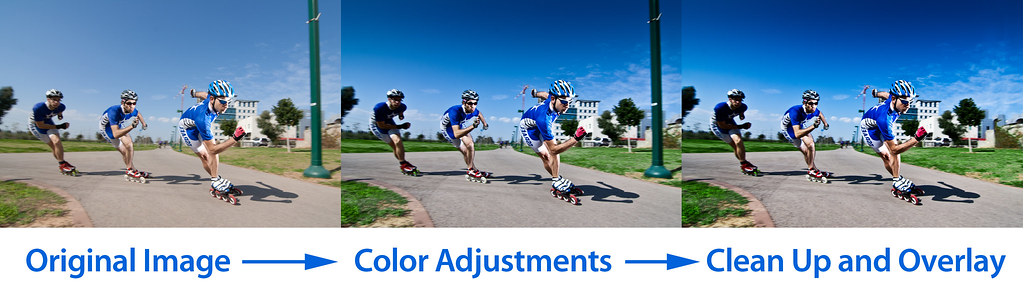
Lastly, in order to get that "Nike commercial"-esque look, some post-processing was necessary. After some color and contrast adjustments, I duplicated the each image as a new layer, applied a very strong unsharp mask plugin, and set the new layers mode as "overlay". Lastly, I set the opacity of the overlay to about 30%, you can see the diferent stages of the process here:
I'll admit it's a bit of an over-photoshopped look for my own taste, but I decided to go for it anyhow, since it really works for these shots, and fits the style of advertisement the marathon organizers are likely to use.
First off, I set up a simple cross-lighting setup for a few "safe" shots, and the obligatory group shot. Two naked speedlights (SB-25, SB-26) on both sides of the skating path aimed straight at the group. The flashes were set to full power (in order to overpower the sun) and triggered by a pair of poverty wizards. For this shot, I asked the our video guy to click the shutter release, so we could get the whole team in the shot (myself included).
Next up, without changing the lighting, I asked the team members to skate down the path, and shot them as they passed through the speedlights.
After having some fun on one corner of the track, I moved the lighting setup to a shadier corner, in hopes of increasing the contrast between the skaters and the background
Lastly, in order to get that "Nike commercial"-esque look, some post-processing was necessary. After some color and contrast adjustments, I duplicated the each image as a new layer, applied a very strong unsharp mask plugin, and set the new layers mode as "overlay". Lastly, I set the opacity of the overlay to about 30%, you can see the diferent stages of the process here:
 |
| (click to enlarge) |
I'll admit it's a bit of an over-photoshopped look for my own taste, but I decided to go for it anyhow, since it really works for these shots, and fits the style of advertisement the marathon organizers are likely to use.
Monday, February 8, 2010
Hunter
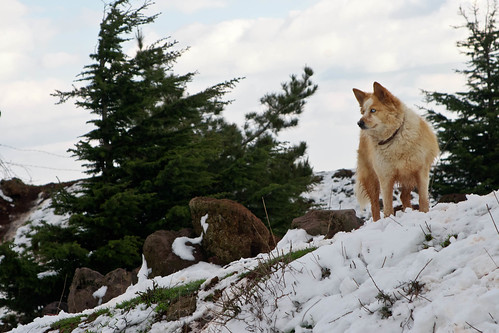
2010 Merom-Golan, Israel
Snow is rare in these parts, but this canine seemed to be in his element.
Tuesday, February 2, 2010
Subscribe to:
Posts (Atom)

